Introduction
A ten-pole allotment is about 250 square metres or 300 square yards, it is considered this area of land can provide vegetables for a family of four for a whole year however to do it a degree of catch cropping is necessary, in other words taking two crops off the same ground in the same year. Of course, most allotments holders may not have the time to cultivate their plot so intensively.
There are many ways of cultivating an allotment, these notes are personal observations and can be used as and where applicable, some might be of help to those new to allotment growing. They are intended as an aid and are certainly not the only approach to growing vegetables. In addition to vegetables, allotments can of course also be used to produce fruit and flowers.
Producing crops on an allotment is quite different from growing in your own back garden.
Firstly, an allotment is probably a much larger area than you could devote to crops at home, good organisation and quick methods make life a lot easier.
Secondly, most gardens are relatively sheltered by buildings, fences, hedges and trees; allotment sites, and Ashbrook is typical are far more exposed to the weather, particularly wind and frost. Use of a greenhouse and cold frame either onsite or at home for raising young plants, also cloches and simple wind protection once plants are in the ground are very helpful.
Thirdly, pests and diseases are far more prevalent on allotments; partly due to there being no respite or break in culture. Some understanding of pest and disease life cycle, various protection methods also where possible using resistant varieties can all help. The damaging effect of most pests and diseases can often be reduced or eliminated by growing in ways to avoid them
Fourthly, taking on an allotment is a significant commitment which if it is to be productive will require adequate time. It is better to begin with a five-pole plot and then if circumstances permit move to a larger one later, five poles well managed is better than ten poles neglected.
Do not let the above put you off, producing crops just for the summer and autumn is fairly easy, with a little thought about varieties and storage, a supply of vegetables is possible for the whole year.
The following are a few points to consider when first taking on an allotment.
Investigation
When first taking on a plot it is worth doing a bit of initial investigation.
If your new plot is covered with weeds do not be disheartened. A covering of chickweed or nettles may seem undesirable but probably suggests the plot has fairly fertile soil.
Half an hour spent digging about four small trial holes about 30 cm (12”) cube will reveal quite a bit about the soil on your plot such as: –
a) The depth and type of topsoil, is it deep enough to grow root crops?
b) The type of subsoil which is best left below but is it free draining?
c) Whether organic material e.g., compost is present.
d) Does the soil hold any goodies such as worms? If the soil is moist and there are none the plot might benefit from the addition of organic material such as compost and/or manure.
e) Are there any baddies such as wire worm?
f) The presence of perennial weeds such as couch grass or bindweed that need dealing with.
g) Whether the soil is panned i.e., hard and compressed.
It is helpful to know the above before starting any cultivation as they are points that could influence your approach and results in the first year. It is also worth having a good look around the whole site for ideas as to what other plot holders do and of what crops grow well. Allotment gardeners tend to be very practical and inventive, particularly when it comes to protection and getting the best out of their crops.
Setting out
How a plot is set out is entirely down to the individual provided any relevant site rules are adhered to; the main requirement is to have ground prepared in time for planting and adequate scope for crop rotation, i.e., to avoid growing crops of the same family in the same ground in consecutive years. Three-year rotation is generally accepted as adequate, four or five is better still.
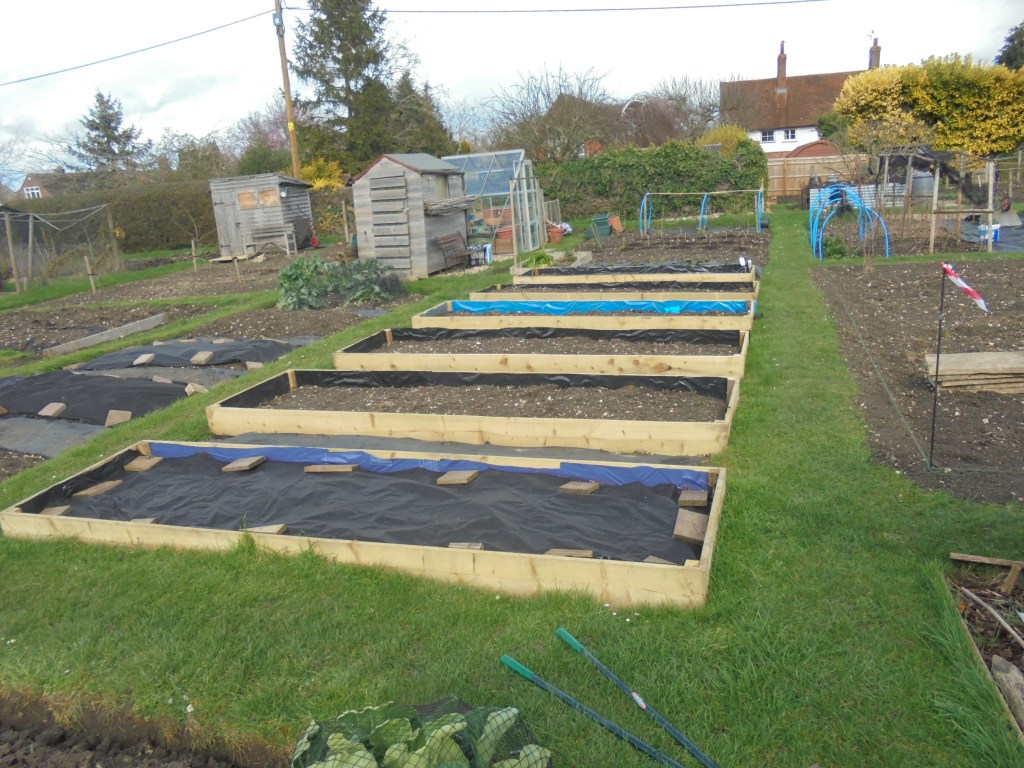
Raised beds are popular; the generally acceptable width is 1.20m (4’) which allows comfortable arm reach across the bed from each side. The beds can be as long as you wish although 2.40m (8’) is common. Timber sides are usual but can decay due to being in continual contact with damp soil, however during the summer the edges can dry out quickly due to evaporation; lining the internal face and bottom edge with strips of black polythene cut from old compost bags are fine and solve these problems.
Forming raised beds does necessitate constructing additional paths which can significantly reduce the actual growing area and for this reason many plot holders favour a more traditional open bed layout which allows a maximum area of productive ground, the choice is yours.
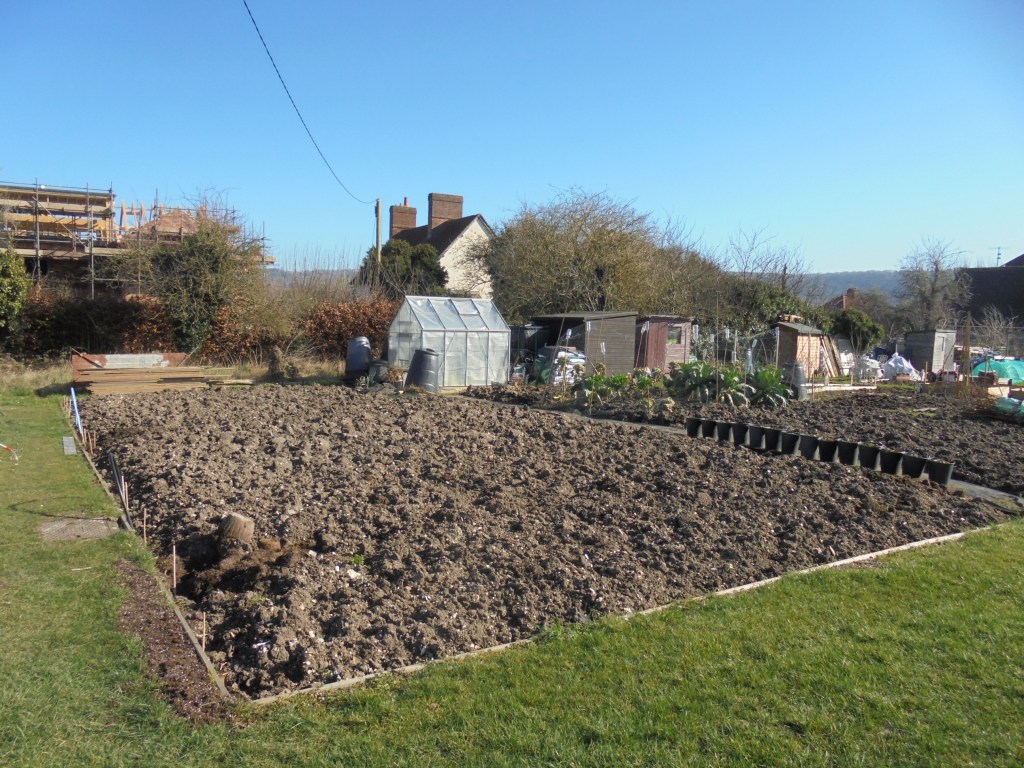
Ground Cultivation
How the ground is cultivated is again an individual choice. Some favour one of the no dig methods, some prefer hand digging, others opt for rotovating, some do a combination of these.
There are several methods of no dig cultivation and they can be used on open plots but probably work better in conjunction with raised beds; with this style of cultivation the ground is initially cleared of perennial weeds as far as possible, then covered with at least 15cm (6”) of well-rotted compost or manure; although not essential some methods recommend overlaying the soil with cardboard or paper prior to spreading the compost; Once set up the ground is disturbed as little as possible and successive layers of well-rotted organic material are spread as and when ground is clear. An ample and continuous supply of properly decomposed compost or manure is required and although by using shredded material, activators and insulation the composting process can be speeded up, many gardeners find it takes between 12 months and two years for material to adequately rot and be in a fit state for use. Ground can be set up at any time of the year although new beds ought to be given a few weeks to settle before planting. Provided properly decomposed compost is used and the plot is maintained weeds can largely be kept under control, a deep, very good soil structure achieved and excellent crops produced.
Conventional digging is favoured by many. These days few gardeners carry out double digging and forking over or single digging with fork or spade is normally adequate. It is worth remembering some of the reasons why hand digging it is done: –
1) To cleanse the ground as best as possible of perennial weeds. I treat weeds such as chickweed, speedwell and groundsel etc as green manure as turned upside down and covered with 6” of soil they won’t grow.
2) To open the ground to allow air into the soil and greater weather penetration by frost and wind, once the top dries in the spring a fine tilth for sowing and planting can be achieved.
3) To place manure and compost where it provides the greatest benefit, i.e., in the root zone.
4) To expose the eggs and pupae of overwintering soil borne pests to frost and predation by birds.
Ground such as Ashbrook can be dug at most times of the year provided it is not too wet however to achieve the full benefit it is best done late autumn and early winter when the soil cools down and as day length shortens, weeds are then less likely to germinate and over wintering pests will be below ground. A “weather window”, normally occurs after the autumn rains have finished and lets the ground dry just sufficiently for it to be dug before the harsher winter weather of January arrives.
Taking out a narrow preliminary trench in September or October and moving the soil to the end of the plot then doing the main digging in December when the soil has cooled makes the job much easier. Compost and manure can be added except where root vegetables such as parsnips and carrots are the next crop as manure could cause them to fang. Stainless steel spades and forks with long handles that before insertion reach the ribcage make the job easier and allow their use as a lever and not as a means of converting you into a crane or bulldozer. If a full-size blade is too large try border or graduate sized tools also keep a scraper handy, if necessary, work off a timber board. Ideally the ground is left as rough as possible so the maximum surface area is exposed to the weather and predating birds. Do a bit at a time, done properly digging should not be arduous.
In springtime ground prepared this way only needs the top surface to dry sufficiently in order to drag a three prong, long handled cultivator through to give a good sowing or planting medium. Weed control during the growing season is then very easy by regular use of a dutch hoe.
Digging ground during the drying months of spring can risk losing winter moisture to evaporation.
Allotments are large areas and some gardeners prefer to use a rotavator in order to get ground under control fairly quickly however to be effective their use does need the soil to be in a fairly dry condition. A fine tilth produced by rotavating in the autumn often results in panned ground and weeds by the spring. However, springtime rotovating done when the soil is starting to dry out can result in all benefit of the previous winters rain being lost due to evaporation. If rain does not fall soon after springtime rotavating and the planting bed is dry extensive watering might be necessary to achieve worthwhile plant growth. Avoid rotavating ground containing perennial weeds such as bindweed and couch grass as breaking their subsoil roots into cuttings can make the situation far worse. Again, incorporating plenty of well-rotted compost will greatly improve the soil.
With an open plot it is preferable to avoid walking directly on prepared ground, if possible, work off a timber board particularly early in the planting year or if the ground is damp.
It is worth remembering the benefits of compost and manure which in themselves contain very little nutrient, most of the goodness having leached away in the decomposing process. Compost provides humus or fibre and is a first-class soil conditioner that encourages strong root growth. It allows good drainage yet acts as a sponge to retain moisture as the soil dries out. Dry roots can’t feed and by retaining moisture it means nutrients within the soil are in soluble form and therefore available to our plants. This combination of, moisture retention, good root growth and accessible nutrients results in a stronger plant, more resistant to pests and diseases and therefore a better crop. The soil at Ashbrook benefits enormously from the regular application of compost and manure and it is very helpful the Association now organises an ample supply of manure for our purchase. In addition to compost and manure a dressing of general fertiliser such as blood fish and bone or Growmore spread and raked in before planting will benefit most crops.
Gardeners often debate the pros and cons of different methods of cultivation however provided they are done properly and at the right time most work well and the choice is yours. Do bear in mind the ground at Ashbrook can dry out very quickly in the spring; rather than method, it is far more important to rotate crops and to have ground in fertile condition, prepared and settled in time for planting so as to take full advantage of the relatively short growing season. Many pests and diseases can be avoided by planting early in the season although some crops might need protection against the weather. In addition, many crops perform far better if grown as the days lengthen.
What and how crops are grown is an individual choice however as with all gardening it is necessary to work with the seasons, cold and wet conditions in the spring are often the norm.
If your own available time and inclement weather prevent part of your plot being prepared in time it can be kept under reasonable control during the summer by planting potatoes. So long as the ground is not too panned it can often be planted with very little cultivation, if necessary, a light forking along the rows will help as would a dressing of a general fertiliser such as blood fish and bone. A late main crop variety with blight resistance, weed suppressing foliage and needing a long season of growth such as Sarpo Mira would be ideal. Plant mid-April, keep an eye out for late frost, earth up as they come through, preferably twice using a border or ladies spade so as to disturb weed growth during the growing season as much as possible and dig up your crop at the end of September. This should leave the ground reasonably clear for the following year.
Supplies
Whilst garden centres and retail units are convenient places to obtain gardening items their range of products is often very limited and inadequate for the allotment holder. Online mail order companies are another option but can become expensive once p & p is added.
There are however two excellent local horticultural trading huts both run by enthusiastic gardeners, one at Aylesbury the other at Dagnall, both stock products specifically for allotment holders. Generally open Sunday mornings they are also a good source of advice, it is very worthwhile joining both, in particular seed potatoes are far cheaper purchased from them where orders are generally taken during September and October for collection the following spring. (check opening days/hours before going while covid-19 is prevalent)
Considerable savings can also be made by buying seeds via a horticultural society purchasing scheme. Such a scheme is available at Ashbrook. The dearer cost of F1 seed that will generally give far superior results to conventional seed is fully justified by purchasing this way.
Remember, most seeds keep for several years provided they are stored correctly, i.e., cool, dark and dry, if possible, buy in December via a purchasing scheme and avoid storing seeds in a shed or greenhouse. Mine are stored in old biscuit tins laid on the concrete floor of our larder. A packet of brassica seeds probably holds 40+ seeds, with say cauliflowers I only want about three plants of a variety so each year I take out about six or eight seeds, chit them for a couple of days to check they are alive, sow in a small pot, eventually plant out my three and give away the rest. The remaining seed is stored for another year.
Some gardeners save their own seed, I don’t for a number of reasons.
- Seed saved from F1 varieties won’t come true to form and is likely to be inferior meaning disappointment the following year.
- On an allotment cross pollination with other varieties grown nearby will probably occur, particularly with crops such as runner beans possibly resulting in an inferior strain being produced.
- The space occupied by leaving plants to produce seed is often more useful if replanted with something else.
- One exception to this is shallots where if your crop and ground are free of onion white rot retaining your best bulbs as seed for the following year should help you keep clear of this disease.
Growing on an allotment is a huge subject and a few sheets on specific crops have been included as part of this section.

Thank you for this comprehensive advice. I’m relatively new to the Ashbrook allotment and new to growing my own veg etc so this has been really informative